|
Aladdin Model 3 Lamps Sold
from January 1911 through August 1912
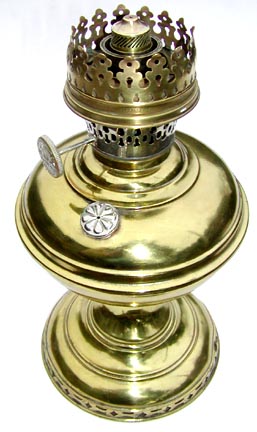 |
The Aladdin model 3 had a number
of changes to make the lamp easier to set up and use which
made it clearly superior to its competition. This,
along with excellent aggressive marketing enabled Aladdin
to dominate the kerosene lighting industry and forced several
competing brands out of business.
Aladdin patented the Kone Kap mantel, a new gallery and flame
spreader. They now were able to make their own mantles to
their own specifications.
The new Kone Kap mantle combined both the mantle holder and
the cone that has previously been part of the gallery. Placement
of the mantle in relation to the flame is more precise with
the new mantel. The lamp became more stable and required less
fidgeting to keep burning properly.
The new Kone Kap mantle and gallery were introduced during late model 2 production as were the thread insert in the lamp bowl and stiffening rays at the bottom of the bowl. The model 3 improvements included a better way to raise and lower the wick, coarser burner threads making it harder to cross thread the burner and shorter slots in the burner side to make it more resistant to breaking when removing a burner that is on tight. the model 3 bowl got a thicker chime. The bottom skirt on the font lamp was modified to be stronger and to let in more air flow. A student lamp was introduced as well as a narrow frame hanging lamp. |
 |
Variations:
Table - Finish: lacquer covered Polished brass or Nickel plated
Font (Wall mount, hanging with shade, hanging without shade
NOTE: Very late versions may have been sold with the new model
4 hangers and wall mounts) - Finish: lacquer covered polished brass or Nickel
plated
Parlor - Finish: Old English or Jap bronze
Oil pot - Finish: lacquer covered polished brass
Accessories:
Bug screen: None
wick cleaner: None
Shade ring: Parlor - generic P&A with shade ring. Others
- generic P&A 3 arm, rectangular cross section or model 6
type
Shades: table - 201 (white opal), hanging - 203 (white opal
dome), Parlor - 201 or 204 shade.
Documents:
Patent covering the model 3 generator and new Kone-Kap mantle filed July 8, 1910 by Charles Hazor Smith, granted April 4, 1911.
Patent for the model 3 burner filed July 8, 1910 by Charles Hazor Smith, granted March 14, 1911
1911 Aladdin lamp catalogue pdf file
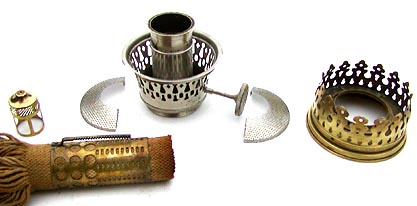 |
The model 3 burner is a completely new design. The shortened slots added a lot of strength to the base. |
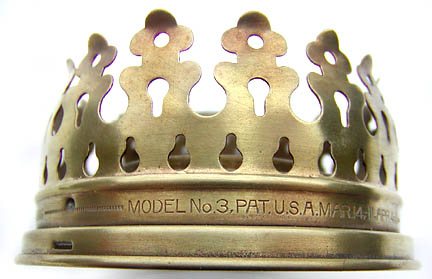 |
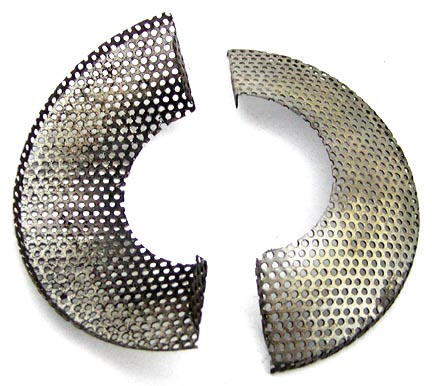
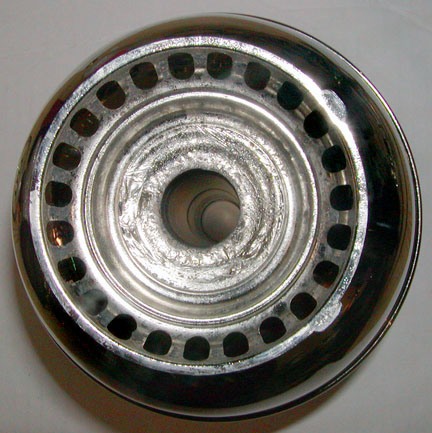
The model 3 gallery is the
first to be designed under an Aladdin patent to fit the new
Kone Kap mantle. Kone Kap mantles were used through model
11.
The model 3 and 4 galleries are the only ones that came with
model numbers stamped on the side. There were two versions
of the model 3 gallery that only vary in the stampings on
the sides. The early gallery was stamped:"MODEL No. 3
PAT. USA MAR. 14, '11, APR. 4, '11" and 1/3rd away around
the gallery: "CANADA JAN. 10, '11, BELGIUM SEPT. 1, '11"
Then about 1/3rd around the gallery: FRANCE OCT. 28, '10 OTHER
PATS PENDING" The later model 3 gallery just had: "MODEL
No. 3" inside a box. |
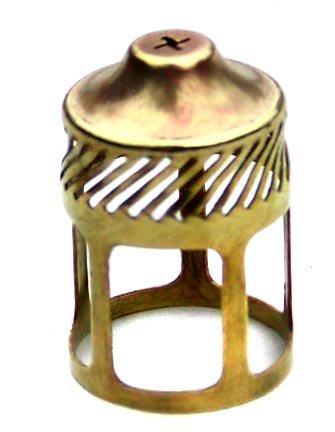 |
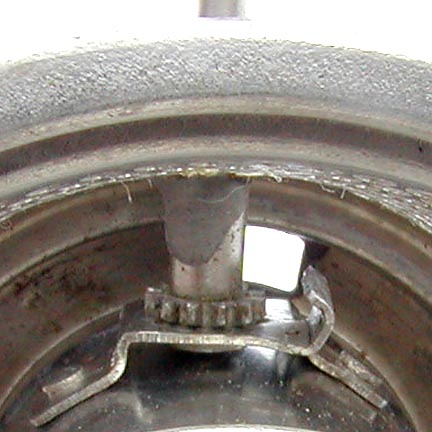
The Aladdin model 3 flame
spreader was designed under Aladdin's patent to work with
the Kone Kap mantle. This design is unique to the model 3
and very late model 2 lamps that were sold with a Kone-Kap
gallery |
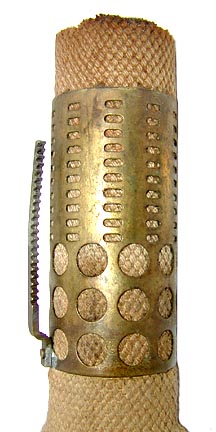 |
The model 3 wick carrier
was the first to have a straight ratchet gear installed on
the side. In a way the wick carrier body is a transition itself.
The top part of the tube has the oval holes used as rack gears
for the previous burners and the bottom has the large round
holes used in the next version of the wick carrier.
This wick carrier was used on model 3 and most if not all
model 4 lamps. Some have been found on early model 5 lamps.
The wick in the picture is a single woven layer. It is unreinforced
and the ends are subject to unraveling. |
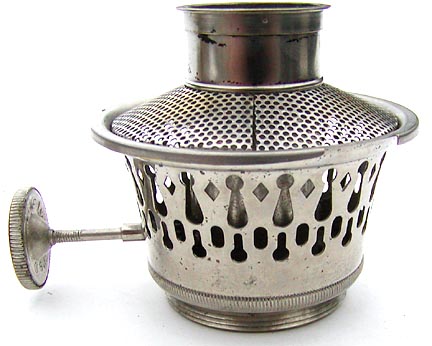 |
There are 2 different versions
of the model 3 burner base and 2 versions of the wick adjuster
knob. The early version has long slots like the model
1 and 2 burners. The later version of the burner base (illustrated)
has the short slots like the model 4 and early 5.
Many changes were made to create the model 3 burner. From
the top down:
The top flange on the outer wick tube is formed and not
a separate part. A distinct ridge has been added to the
outer wick tube to anchor the air distributor. The
ridge helped the air distributor stay in place better. The
air distributor is two piece and mounted convex.
The long slots in the side of the burner have been changed
to two slots. This made the burner base more resistant to
cracking from the twisting force used to install and remove
the burner.
The wick adjuster has been centered side to side on the
burner and gearing has been added. This
provided finer adjustment of the wick with less turning force
on the knob. The wick adjuster knob is
formed and no longer a stamped disk. A taper can be seen
behind the formed knob where it joins the shaft.
The threads that mount the burner to the lamp font are coarser.
The earlier fine thread was easy to cross thread. The
coarser thread allowed the burner to go on easier
and with less fuss. This burner will not fit on earlier
fonts without serious cross threading that will damage the
font.
The late burner base (illustrated) and air distributor remains
unchanged for models 4 and early 5 except for the wick adjuster
knob. |
 |
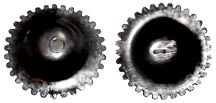
This shows the changes in
the wick adjustment gearing that was used on model 3 through
6 burners.
The rack gear on the wick holder came up through the rectangular
hole on the underside of the burner and was held in place
next to the burner's adjuster gear by the 'C' shaped channel. |
 |
The air distributor is 2 piece
with the side and outside edge flanges pointing downward. It
is held in place by a tension fit between the ridge in the centre
of the outer wick tube and the inside top of the burner base.
This design is used in models 3, 4 and early 5 burners. |
 |
A complete Aladdin model
three burner without the gallery. At a quick glance and without
the flame spreader the lamp could look like a model 3, 4 or
early 5.
Model 3 through 6 table fonts and 3 through early 5 burners
are virtually identical and require close examination to
identify them. Model 3 and 4 hanging fonts appear the same.
The bottom skirt on the model 3 has 23 air holes. The model
4, 5 and 6 bottom skirts are identical with 18 air holes. |
 |
Aladdin Model 3 font for hanging
and wall lamps
This font has a 1-1/2 quart capacity and a new bottom
vent with 23 slots which is diagnostic for this font. The
model 4 font is identical except that the bottom skirt has
18 vent slots. The model 5 1-1/2 quart font looks
the same except that it has stiffening rays around the bottom
skirt and 18 vent slots.
|
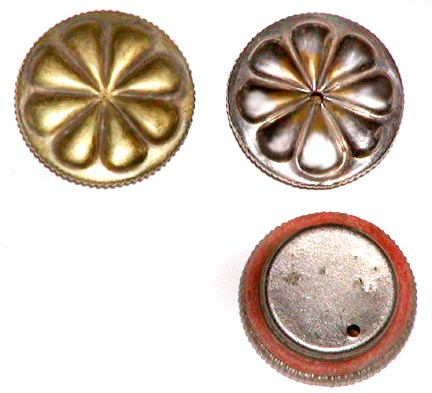 |
Aladdin model 1 through 6 used a filler cap with a flower
pattern on top. There were two varieties, vented, with a hole
in the centre top and unvented.
Models 1 through early 5 lamps with slotted burners used
the vented cap. late model 5 and model 6 screen burners
used the non vented type.
Note that parlor lamps used a completely different vented
filler cap. |
 |
Smoke bell was used on all hanging
lamps from model 1 through 6 except for the model 3 and 4
chandeliers.
NOTE: These have been reproduced in brass. The original Aladdin smoke bells are made from a non-magnetic nickel Iron alloy. |
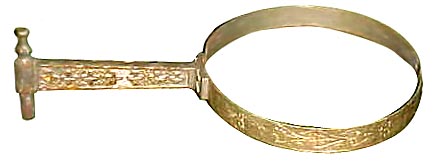 |
Wall bracket used on model 1 through 4 lamps. Note the
ring is nonadjustable like the model 23 deluxe bracket. The
difference being the pattern stamped into the early ring. |
 |
This shade ring was used on model 1-4 hanging lamps that
came with a 203 shade. It just slides down the harp
and rests there.
Note the large head shade securing screws. These
screws are unique to this shade ring. If you are
missing one or more, the shade ring is tapped for a 10-24
screw size. |
 |
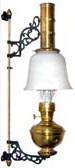
Style 192B Model 3 hanging lamp with dome shade style 203. Being the least expensive hanging lamp with a shade it is the most common style. |
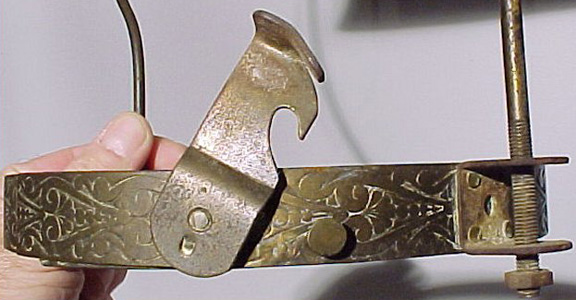 |
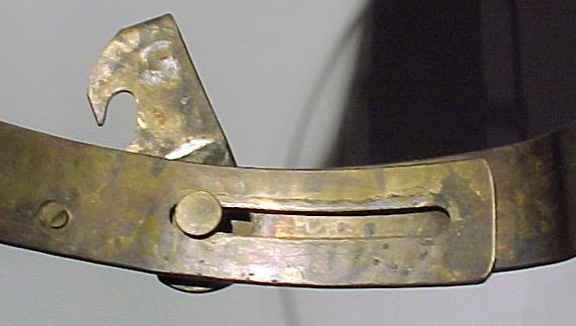 |
The pictures above show the latch used on the hanging lamp bottom ring for the model 2 through most of model 4. The model 1 used a different latch and a different latch was introduced late in model 4 production. The Aladdin wall mounting brackets used the same pattern on the ring as the hanging lamps. |
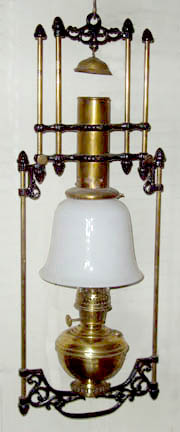 |
Aladdin Model 3 hanging lamp # 113
This hanger was available for both model 3 and model 4 lamps. Finish is
old gold for the brass parts and ebony black on the cast iron
parts. It
only came with the #205 shade as shown. This lamp sold
new for twice the price as the more common hanging store lamp.
The adjustable draft tube of a model 3 chandelier has 8
vent holes around the draft tube near the base, a visible
vertical seam and 10 vent holes where the shade attaches. The
model 4, 5, 6 and 23 (student lamp) draft tubes have 16 vent
holes where the shade attaches plus 12 on the lower side of
the tube and no visible seam. |

detail of top casting for model 3 & 4 chandelier
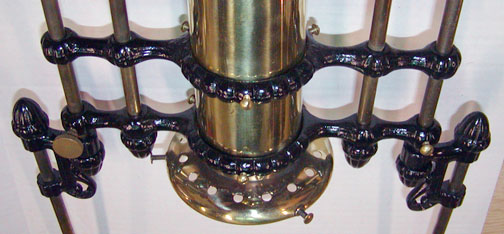
Mid casting used on the model 3 & 4 chandeliers
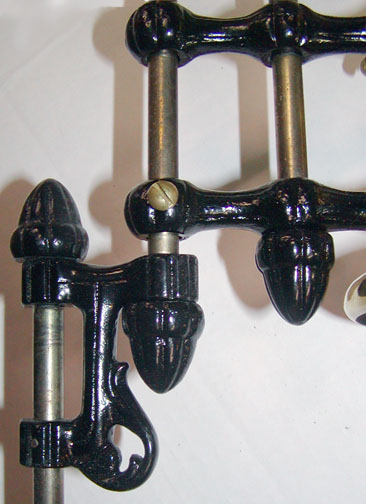
Close up detail of the Aladdin model 3 & 4 chandelier. Brass screw is wrong for the lamp.
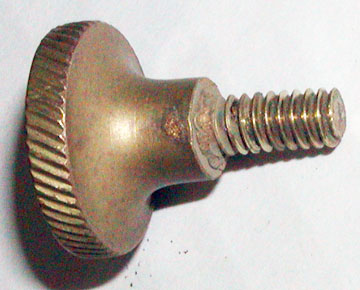 |
Correct screw used throughout the Aladdin models 3 & 4 chandeliers. |
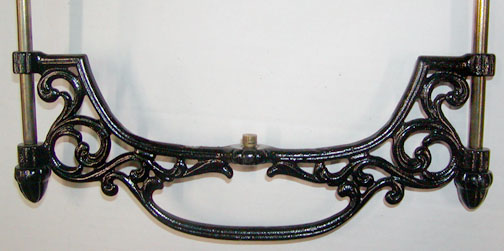
Bottom casting used on the Aladdin models 3 & 4 chandelier.
Parts support:
Mantles: Production of Aladdin KoneKap mantles ceased in 2007. In 2012 Aladdin introduced an adapter that fits onto a model 3 through 11 gallery that allows the use of a Lox-On mantle with the earlier lamps.
Wick/Carrier: Models 4, 5 and 6 mounted wicks can be used. Model 6 wicks were discontinued in 1955.
Gallery: The model 4,5 and 6 galleries can be used.
Generator: Unique to model 3
Burner: Model 4, 5 and 6 burners can be used. The thread diameter was changes starting in model 7.
|
| If you would like to discuss any of the contents
please feel free to
.
© 2002, 2015 by TeriAnn
Wakeman. All rights reserved.
This web site is not affiliated with Aladdin Mantle Lamp Company.
Aladdin, and Lox-on are registered trademarks of Aladdin Industries
LLC
|